

How To Animate A Character Unreal 4
Senior grapheme modeler, Crystal Bretz, shares her experience in creating an animated game character for Unreal Engine by using Character Creator and iClone.

Crystal Bretz is a Senior Character/Creature Modeler working in Canada. She has worked for many companies over the years such equally Method Studios, DNEG, Artifex Studios, Redpill VR, TLM Partners Inc and BRON.
Crystal is currently working equally a Senior Modeler at Digital Domain. She has a groundwork every bit a generalist and has worked on many different types of media such as; Idiot box episodic, Short films, Feature films, VR, and blithe features.
In this tutorial, Crystal will be showing how easy information technology tin exist to create a character from a concept with Character Creator and transport it into the Unreal Engine using the LiveLink from iClone.
Function 1: Creating Character Model in Character Creator and Sculpting in ZBrush
The beginning step of this project is to lucifer the trunk proportions to the wonderful concept past Jue Li and it is made very elementary with the utilise of Graphic symbol Creator three (CC3).
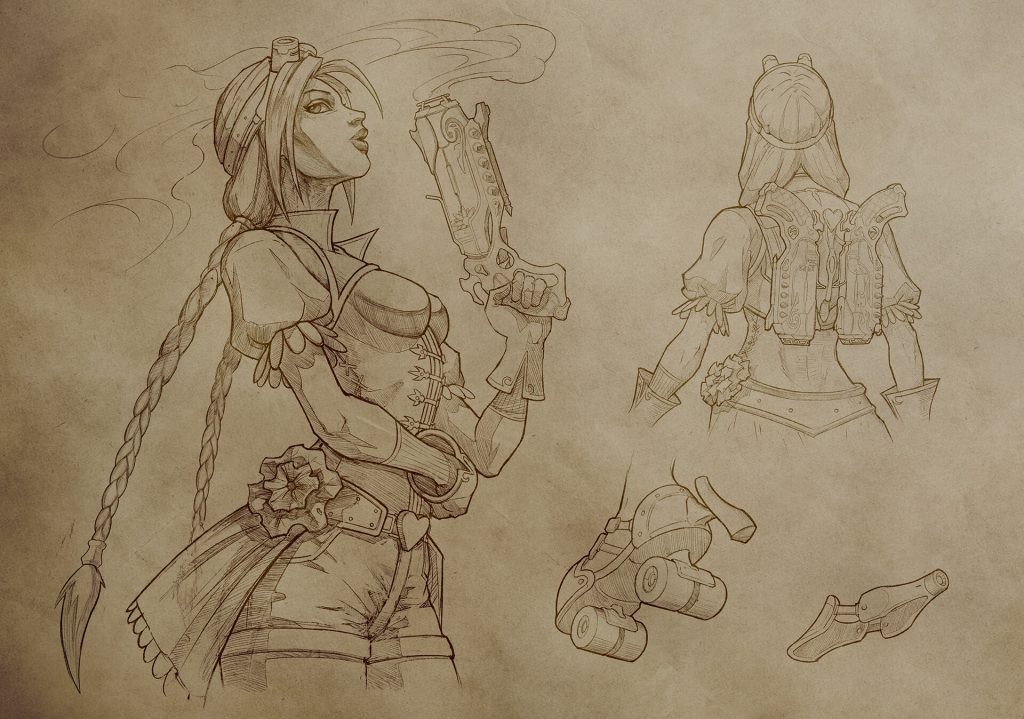
The grapheme base (CC3+) mesh utilizes UDIM workflows every bit well as has optimized geometry and UVs to allow for a better final grapheme as well every bit opens more doors and opportunities in terms of texturing methods.
I utilized the morph sliders to fine tune all the muscles and proportions, and so used GoZ to transport the character into ZBrush for a final sculpt pass on the torso. While I'm in ZBrush, I try to be careful to not move the positions of any geometry affected by a bone, such equally elbows or eye locations. It'due south best to change these things inside Character Creator and sculpt details inside ZBrush. I then sent the torso mesh back to Character Creator and transferred all of the newly sculpted details dorsum to the base mesh simply past updating the mesh.
Office 2: Modeling Clothes and Accessories in ZBrush, Maya and Marvelous Designer
The next thing is to model the costume. I began by blocking out base of operations forms in ZBrush by masking sections of the model, extracting the mask, zremeshing to refine the edges, and and then panel looping to add thickness, if needed. I do this equally a first pace to proxy out the proportions of the costume and establish the forms and silhouette. My adjacent steps were to apply Maya for whatever difficult surface modeling, as well equally finalizing the proxy meshes I made in ZBrush. I also used Marvelous Designer quickly to create the flowy skirt.
After completing the final models in Maya, I brought the entire outfit into ZBrush for a concluding sculpting pass, created low poly meshes from the final sculpt and used GoZ to send the geometry back into Character Creator. Upon the geometry returning to Grapheme Creator, I was making sure to plant if the geometry is clothing or an accessory equally this establishes how it is skinned to the body. Accessories volition follow the bones and clothing objects will skin to the trunk and current skin weights.
Part three: Texturing the Body and Outfits with Substance UDIM Workflow
After I accept modeled the body and the outfit, I begin texturing. I started this past baking my high poly sculpted geo to my low poly model that has the ideal UV layout. I will bake a normal, AO, curvature, ID, world infinite normal, and position maps. Once this is done I tin save these for importing and using within Substance Painter after.
The new CC3+ base of operations mesh has a UDIM tile UV layout which allows for a seamless workflow within Substance Painter utilizing its new UV tile workflow options. I chose to work with the clothes using texture split texture sets to demonstrate the versatility of the new base and the unlike ways you can work with your characters going forward. On this specific grapheme, I take textured the wear in a split up Substance scene than the trunk, because I had a lot of texture sets and was worried that the amount of large maps could create too large of a file size to work with if the body was included.
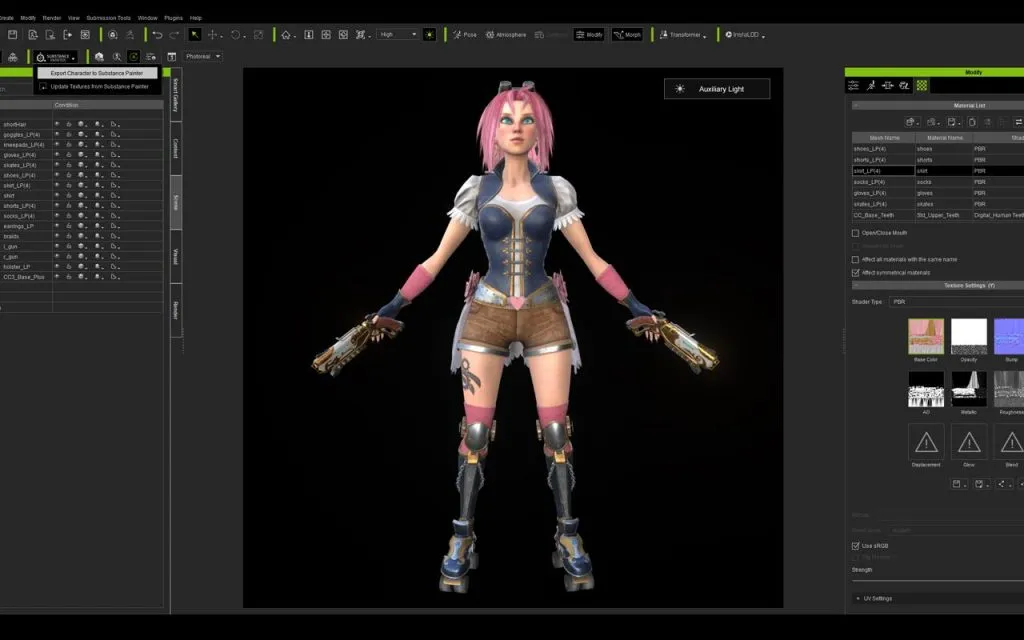
The first stride for texturing the body is to make sure the grapheme is in A pose in Grapheme Creator and then click the "Export Character to Substance Painter" button on the top bar to export the model. This will export the model and the maps in neat folders for me to set upward inside Substance Painter and begin the texturing process.
In one case the texturing is completed, I exported the maps using the Character Creator to export the appropriate maps to use to my model inside CC3.
Applying the new textures to the model in CC3 is very unproblematic, yous only need to click the "Update Textures from Substance Painter" button on the top bar and navigate to the exported maps and information technology will all load into their respective spots.
Part four: Utilizing the Content Library inside Graphic symbol Creator to Create Original Designs
The next thing I want to talk about was the importance of utilizing the content library for the creation or this graphic symbol. Character Creator has an astonishing content library full of many useful tools; annihilation from poses to lighting rigs.
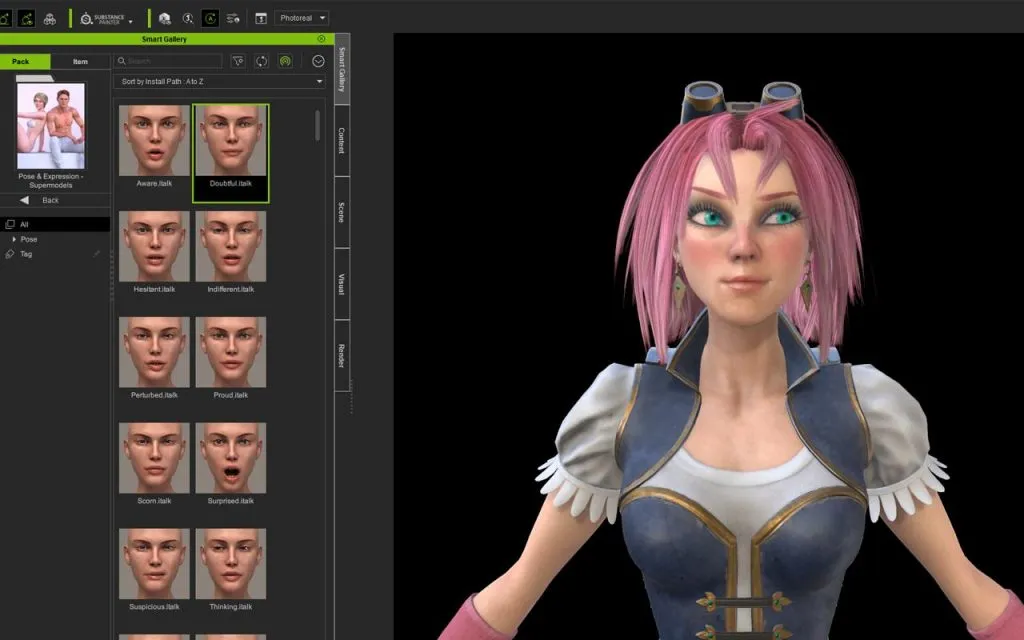
During the course of this project I used many of these tools to aid forth the way. I used built-in eyebrows with color customizations, SkinGen for tattoo and makeup, Facial and Pose Editor for posing, and many lighting setups to finalize my graphic symbol.
Part 5: Animating with iClone and Alive Link to Unreal Engine
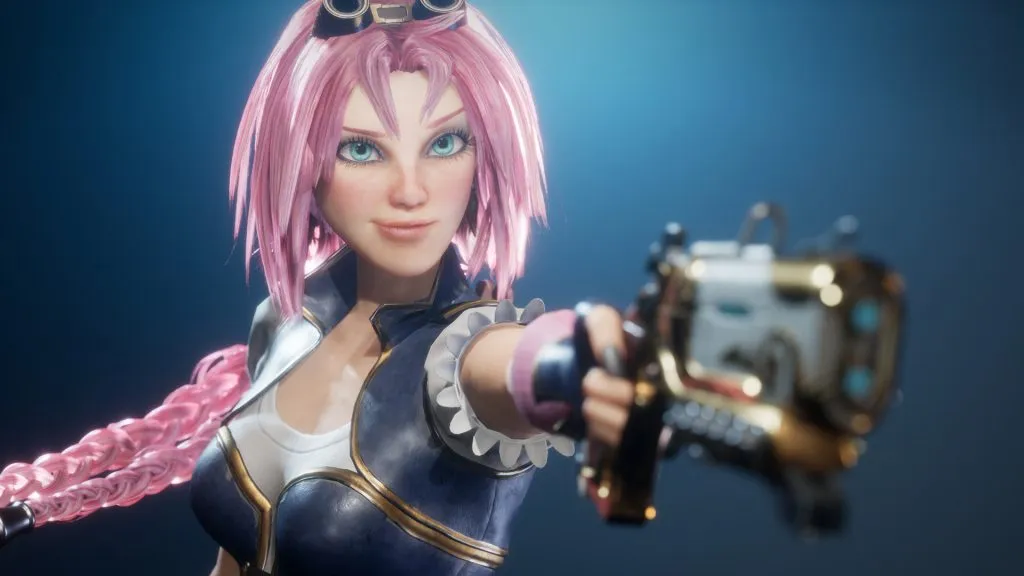
The final stage of this project was to breathing in iClone and use the Alive Link to send the model straight into the Unreal Engine. iClone has so many useful tools for animation, but utilizing the Live Link helped me to accommodate camera angles and animation choices in real time instead of making the iterations and reimporting the new character animation every time. I utilized the mocap animations already inside iClone and the purchased content assets, and composite them together with others to create a seamless blitheness that still felt very real.
Once the character was inside Unreal Engine, I ran the Auto Setup tool to gear up upward the materials properly. There were some physics tweaks with the skirt and cloth tweaks on the hair that were needed equally they don't transfer at the exact same values, but polishing this inside Unreal Engine is very simple. Overall utilizing the iClone Unreal Live Link was actually quick and well worth it to present my final character.
Cheers for reading! Yous can download a complimentary trial of Character Creator, and iClone to test out by yourself.
Source: https://magazine.artstation.com/2021/04/create-animatable-game-character-for-unreal-engine-with-character-creator/
Posted by: estradasoffew.blogspot.com
0 Response to "How To Animate A Character Unreal 4"
Post a Comment